
Starlink Installation Melbourne
Get Starlink installation in Melbourne that is planned around the way your property actually works. Next Antenna helps homes and businesses with dish positioning, roof or wall mounting, cable routing, router setup, Wi-Fi checks and final testing.
The goal is simple: a secure mount, a cleaner cable path, clear signal positioning and a setup that is useful after the installer leaves. Whether you need Starlink installed on a tiled roof, metal roof, wall bracket or another suitable mounting point, the installation needs to match the property.
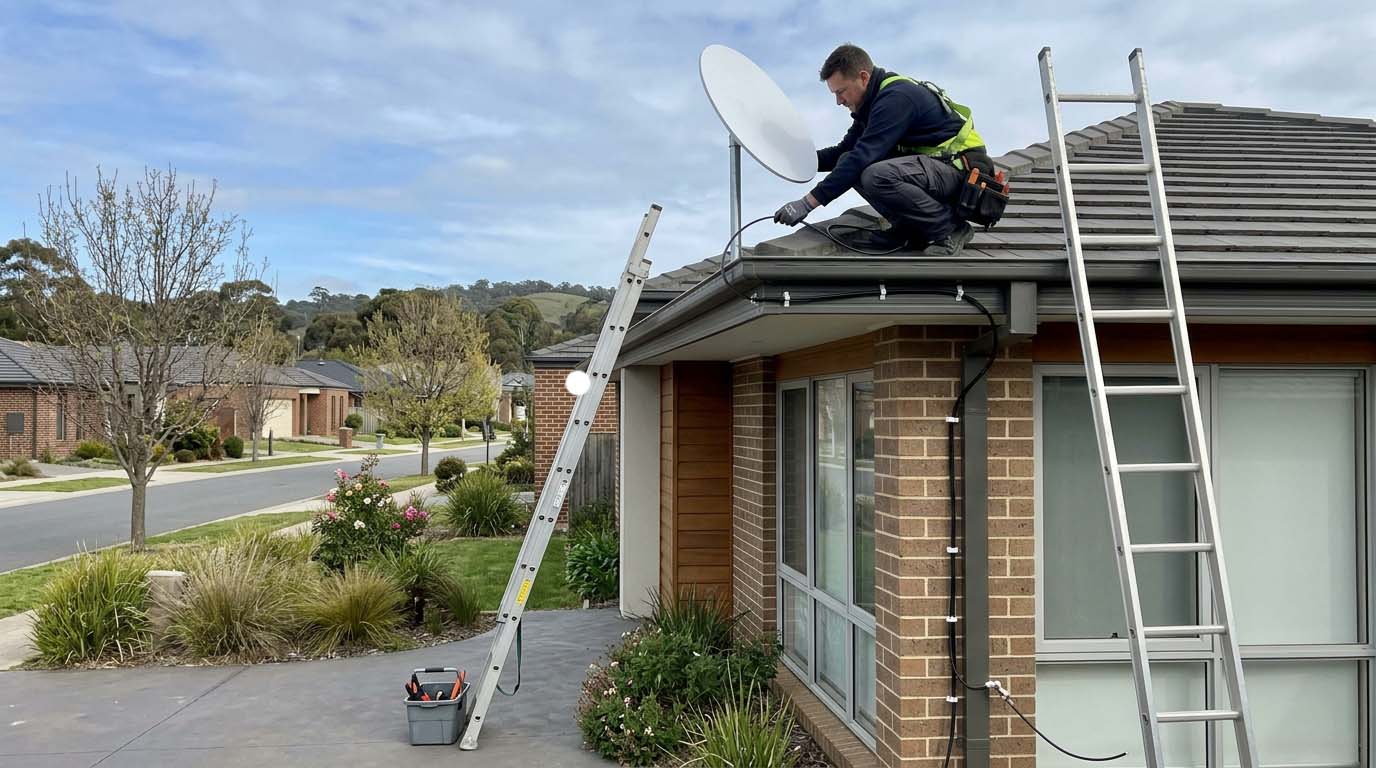
Planned dish placement
The Starlink position is considered around roof access, obstructions, mounting options, cable path and the areas that need internet coverage.
Mounted and tested
The setup can include secure mounting, cable routing, router connection, Wi-Fi checks and basic handover before the job is finished.
Homes and businesses
Support for houses, units, shops, offices, small business sites and other Melbourne properties that need practical Starlink setup.
Great service from Next Antenna, prompt, friendly and reasonably priced. The installation at our home was completed neatly, and everything works perfectly.
Vinod Chavda
We recently used Next Antenna for work at our house and had a fantastic experience. The technician arrived on time, explained everything clearly and completed the job with great care... Read more
Parth Chavda
I had a fantastic experience with Next Antenna. The service was professional, reliable and very well organised from start to finish. They clearly know their work... Read more
Dee Patel
Highly recommended he installed starlink very quickly and professionally.
Muhammad Asim Raza
Insured, registered and trained for safe installations
Next Antenna brings practical installation experience to Starlink, cabling, roof access and connected-property work. That matters when the job involves mounting hardware, routing cable, checking Wi-Fi and working safely around the property.
Public Liability Insured
Insurance cover for professional installation work around homes and business properties.
Security Licensed
Licensed support where connected-property work overlaps with security, CCTV or alarm-related systems.
ACMA Registered Cabler
Registered cabling support for data, telecommunications and connected network systems.
Working at Heights Trained
Training for safer roof, access and mounting work where the installation requires it.
Starlink installation for homes and businesses
Starlink installation is not just about getting the dish onto the roof. Some customers need a new Starlink kit installed from scratch. Some need help choosing a roof or wall mount. Others need an existing dish repositioned, a cleaner cable route, router setup or better Wi-Fi coverage inside the property.
Next Antenna keeps the service focused on the real need: a secure Starlink setup with sensible dish placement, tidy cable routing where possible, practical internal setup and testing so the connection can be used properly.
A practical setup, not just a dish on the roof
A good Starlink setup starts before the first bracket is fixed. Roof type, mounting position, obstructions, cable entry, router location, power, Wi-Fi coverage and safe access can all affect the result.
That is why Starlink installation should be planned around signal path, secure mounting, weather exposure, cable routing and the way the internet will be used inside the property. A poorly positioned dish or messy cable path can create problems later.
What Starlink installation can include
A Starlink installation can involve more than mounting the dish. The service can include a site check, mounting advice, roof or wall installation, cable routing, router or Wi-Fi setup, connection checks and basic handover.
The exact work depends on the property, roof access, mount type, cable path, Starlink kit supplied, router location and whether extra Wi-Fi, mesh or access point support is needed inside the property.
Site check and obstruction planning
A review of dish position, roof access, likely obstructions, cable path, router location and suitable mounting options.
Roof or wall mounting
Starlink can be mounted on a suitable roof, wall or bracket position where the property and hardware allow it.
Cable routing and entry point
Cable routes are planned to keep the installation practical, safe and tidy where possible.
Router and Wi-Fi setup
The Starlink router can be connected and checked, with support for Wi-Fi placement, mesh or access points where needed.
Signal and connection checks
The dish position, basic connection behaviour and internal Wi-Fi can be checked before handover.
Advice for future upgrades
Guidance on better Wi-Fi coverage, data cabling, access points or repositioning if the property needs more support.
Starlink setups Next Antenna can help with
Different properties need different Starlink setups. A single-storey home may have a simple roofline and short cable path. A double-storey home, tiled roof, metal roof, shop or commercial site may need more planning around access, mount position and cable routing.
Next Antenna can help with new Starlink installation, roof mounting, wall mounting, dish repositioning, customer-supplied kits, router setup, Wi-Fi checks and internal network support where the Starlink connection needs to work across more of the property.
Roof mounting
A common option when the roofline gives the dish a clearer view and the mount can be installed safely.
Wall mounting
Useful when a wall bracket gives a practical position, cleaner access or a better cable path than the roof.
Router, Wi-Fi and devices
Starlink setup can include router connection, mesh Wi-Fi, access points and checks for smart TVs, phones, computers and cameras.
Starlink installation for homes
Home Starlink installation is usually about getting a reliable internet setup where fixed-line internet is poor, unavailable or not working well enough for the property. Common needs include roof mounting, cable routing, router placement and better Wi-Fi through the home.
A home setup can include Starlink dish placement, roof or wall mounting, cable entry, router connection, Wi-Fi checks and advice on mesh or access points if coverage is weak in bedrooms, living areas, home offices or outdoor spaces.
For double-storey homes, tiled roofs, metal roofs or properties with tricky cable paths, planning becomes more important. The aim is to balance signal path, safe mounting, clean cabling and usable internet coverage inside.
Starlink setup for shops, offices and small business sites
Business Starlink installation usually needs more attention to placement, reliability and how the connection will be used. Shops, offices and small business sites may need internet for staff devices, customer areas, point-of-sale systems, cameras, back rooms, workstations or temporary site needs.
The goal is not just to mount the dish. The goal is to position the Starlink hardware properly, route cable neatly where possible, connect the router and check whether the Wi-Fi or network setup supports the way the business works.
Commercial sites may also need better internal Wi-Fi, data cabling, wall plates, access points or a clearer router location so the Starlink connection performs beyond the first room.
Starlink dish placement and signal planning
The best Starlink setup starts with the dish position. The dish needs a clear view of the sky, a secure mount, a practical cable path and safe access for installation. Trees, rooflines, nearby buildings, metal structures and other obstructions can affect performance.
Good placement considers roof type, mounting height, weather exposure, cable route, router location, internal Wi-Fi coverage and whether the property needs internet in one area or across several rooms. A clear signal path helps the system work as intended.
Common home locations
Roof areas, wall brackets, garages, side walls, cable entry points, home offices and living areas where the router or Wi-Fi is needed.
Common business locations
Shops, offices, work areas, counters, back rooms, site offices, staff areas and places where Wi-Fi or wired access is needed.
Connection checks
Dish placement, router setup and internal Wi-Fi should be checked before handover so the setup is clear.
Mounting, cabling and Wi-Fi setup matter
Starlink performance is affected by more than the dish. The mount position, cable path, entry point, router location and internal Wi-Fi setup all affect how useful the service feels inside the property.
Some properties need a simple router connection after the dish is installed. Others need a better Wi-Fi location, mesh Wi-Fi, wired access points, wall plates or data cabling so the connection reaches the areas where people actually use it.
This is where Next Antenna’s broader connected-property experience helps. Starlink installation, Wi-Fi installation, CCTV camera installation and data cabling often overlap, especially when homes or business sites need internet coverage beyond the room where the router sits.
Useful setup details to confirm
How much does Starlink installation cost in Melbourne?
Starlink installation cost depends on roof height, roof type, mount type, cable length, wall access, safe access, cable routing, router location and whether extra Wi-Fi or network setup is required.
A straightforward single-storey installation is different from a double-storey roof, tiled roof, longer cable path, business site or setup that needs mesh Wi-Fi, data cabling or access points after the dish is mounted.
Next Antenna can provide a practical quote after understanding the property, the Starlink kit you have, the likely mount position and what you need the connection to do inside the property.
Roof access and layout
Height, roof pitch, roof material, access points and safe mounting position can change the work involved.
Mount and cabling needs
Cost can change if the job needs a roof mount, wall mount, longer cable route, entry point planning or internal cabling support.
Setup and testing
Router setup, Wi-Fi checks, mesh support and final handover can affect the final scope.
New Starlink installs, repositioning and setup fixes
Every Starlink job starts in a different place. Some customers have a new Starlink kit ready to install. Some need help selecting a suitable mount location. Others have an existing setup that needs repositioning, cleaner cable routing or better Wi-Fi inside the property.
For a new setup, the main questions are dish position, roof or wall mount, cable path, router location and whether Wi-Fi coverage needs extra support. For customer-supplied kits, the important details are model, hardware condition, cable length, mount type and whether the kit includes everything required.
This avoids a common frustration: installing the dish first and then finding out the internal Wi-Fi, cable route or mounting position does not suit the property.
New Starlink setup
Plan the dish position, mount type, cable path, router location and Wi-Fi needs from the start.
Customer-supplied hardware
Check whether the Starlink kit, mount, cable and router are suitable for the property and ready to install.
Existing setup fixes
Review dish position, cable path, weak Wi-Fi, router placement and whether the setup can be improved.
Starlink router setup, Wi-Fi checks and handover
A Starlink connection should be easy to use after it is installed. Dish placement matters, but so does the router position, Wi-Fi reach and whether devices can connect in the areas that matter.
Router and Wi-Fi setup can include checking the Starlink router, placing it in a practical location, testing Wi-Fi in key areas and discussing mesh Wi-Fi or access points if the property needs broader coverage.
Network reliability is also important. A property can have a working Starlink dish but still suffer from weak Wi-Fi inside. Where needed, Starlink setup can be planned alongside Wi-Fi installation, wall plates or access point improvements.
Router connection
Connect and check the Starlink router where the equipment and service are ready.
App and Wi-Fi access
Check basic Starlink app access, router placement and Wi-Fi behaviour where supported.
Network checks
Review whether Wi-Fi signal, access points, data cabling or router location could affect reliability.
Roof mount vs wall mount for Starlink
Roof mounts and wall mounts can both be useful, but they suit different properties. A roof mount may give the dish a clearer view of the sky. A wall mount may offer easier access, a cleaner cable route or a safer position depending on the building.
The right choice depends on roof type, obstructions, height, cable entry, weather exposure, access and where the router needs to sit inside. A mount that looks convenient from the ground is not always the best signal position.
Next Antenna can help assess the practical mounting option before installation, so the setup is based on the property rather than guesswork.
Which mount suits your property?
A roof mount is often a practical choice when height gives the dish a better view and safe access is available. It can suit homes where trees, neighbouring buildings or rooflines may affect the signal.
A wall mount can be useful where the wall position gives a clear view, a better cable path or easier access than the roof. It still needs to be mounted securely and positioned with obstructions in mind.
Some properties may need a different bracket or positioning approach. The quote should consider the mount, roof access, cable path and internal setup together.
A simple Starlink installation process
The process is designed to move from practical planning to a secure and tested setup. The aim is to avoid guesswork, reduce messy cable runs and make sure the connection is useful in the areas where people actually need it.
A clear setup also makes the quote easier. Roof access, mount type, cable route, router location and internal Wi-Fi needs all affect the job.
1. Review the property
Confirm the roof type, access, possible obstructions, cable path, router location and whether the Starlink kit is ready.
2. Plan the setup
Work through mount position, cable routing, entry point, router placement, Wi-Fi needs and any access point support.
3. Install and test
Mount the hardware, route the cable, connect the router and check the setup before handover.
Starlink installation across Melbourne properties
Next Antenna supports Starlink installation and setup across Melbourne properties, including homes, units, shops, offices and small business sites.
Support can include Melbourne CBD, western suburbs, northern suburbs and other areas where the job location and booking availability suit. The best way to confirm service availability is to send through the property type, suburb and what you need help with.
Property types covered
Practical Starlink installation with clean workmanship
Next Antenna is a strong fit for Starlink installation because the job often depends on more than the dish itself. The setup may involve roof access, mounting, cable routing, data cabling, router placement, Wi-Fi setup, CCTV connectivity or other connected systems around the property.
That means the job benefits from an installer who understands the physical side of connected-property work. A cleaner setup, better placement and practical testing can make the connection easier to use after the installer leaves.
Clean installation
Cable routes, mount position and equipment placement are considered so the finish is tidy where possible.
Practical advice
Guidance is based on roof access, signal path, property layout and internal coverage needs.
Connected setup
Starlink can be considered alongside Wi-Fi, data cabling, CCTV and other connected devices.
Tested before handover
The dish, router and internal Wi-Fi setup can be checked before the job is wrapped up.
What to check before requesting a Starlink quote
A clear quote is easier when the main details are known. You do not need to have every technical detail ready, but it helps to think about the roof type, where the dish could be mounted, whether trees or buildings may block the view and where the router needs to sit inside.
If you already have the Starlink kit, check whether you have the dish, router, cable, power supply and mount. Photos of the roofline, possible cable path and modem/router location can also help with the quote.
A few details help us recommend the right setup
Starlink installation answers that help you plan the setup
These are the questions people usually ask before booking Starlink installation. The answers cover cost, hiring an installer, roof and wall mounting, cable routing, Wi-Fi setup, Starlink hardware and what to check before requesting a quote.
How much does Starlink installation cost in Melbourne?
Starlink installation cost depends on the roof type, safe access, mount type, cable path, cable length, router location and whether Wi-Fi, mesh or access point setup is also needed. A simple install is different from a double-storey roof, tiled roof or business setup with extra network requirements.
How much does it cost to get someone to install Starlink?
The cost to get someone to install Starlink depends on the property and the install scope. The quote usually changes based on the roof access, mounting position, bracket type, cable route and whether the internal router and Wi-Fi setup need extra work.
Can I hire someone to install my Starlink?
Yes. You can hire a technician to install Starlink if you want help with dish placement, roof or wall mounting, cable routing, router setup and basic testing. This is useful when the roof access is difficult or the cable path needs to be planned properly.
What does Starlink installation include?
Starlink installation can include a site check, dish placement, mounting advice, roof or wall installation, cable routing, router connection, Wi-Fi checks and basic handover. The exact work depends on your property and the Starlink kit you have.
Do you install Starlink for homes and businesses?
Yes. Starlink can be installed for homes, units, shops, offices and small business sites where access and mounting conditions allow. Home installs usually focus on household coverage, while business installs may need stronger internal Wi-Fi or network support.
Do you install Starlink on tiled roofs and metal roofs?
Yes, where safe access and the correct mounting approach are available. Tiled roofs, metal roofs and double-storey homes can require extra care because access, fixing points, cable path and roof condition all affect the installation.
Can you mount Starlink on a roof or wall?
Yes. Starlink can be mounted on a suitable roof or wall position where the property and hardware allow it. The best option depends on signal view, safe access, cable routing, roof type and where the router needs to sit inside.
Can you route the Starlink cable inside?
Starlink cable routing can be part of the installation. The cable path depends on where the dish is mounted, where the router will sit, the wall or roof construction and whether a clean internal path is practical.
Do I need to supply the Starlink kit before installation?
In most cases, you need to have the Starlink kit before installation. It helps to confirm the model, cable length, power supply, router and mount hardware before booking so the installation can be quoted properly.
Can you reposition an existing Starlink dish?
Yes. An existing Starlink dish can often be reviewed and repositioned if the current location has obstructions, poor access, messy cabling or weak internal setup. The best fix depends on the property and current hardware.
Do you test the Starlink connection after installation?
Yes. The dish position, router connection and basic Wi-Fi behaviour can be checked before the job is finished. Testing helps confirm the setup is working and makes weak internal coverage easier to identify.
Do you help with Starlink router setup?
Yes. Starlink router setup can be part of the service where the equipment and account are ready. This can include connecting the router, checking basic app access and confirming Wi-Fi works in key areas.
Do you install mesh Wi-Fi or access points with Starlink?
Yes. Mesh Wi-Fi or access points can be discussed if the Starlink router does not cover the whole property well. Larger homes, offices and business sites often need extra Wi-Fi planning after the dish is installed.
Can Starlink be installed for shops, offices and small businesses?
Yes. Starlink can be installed for shops, offices and small business sites where the property, mounting position and service needs are suitable. Business setups may also need stronger internal Wi-Fi, data cabling or access points.
How long does Starlink installation take?
Timing depends on roof access, mount type, cable path, property height, wall entry, router location and whether extra Wi-Fi or network setup is required. A simple install is usually quicker than a double-storey or business setup.
What affects the price of Starlink installation?
The main pricing factors are roof access, roof type, mount choice, cable length, cable routing, wall entry, router location, Wi-Fi needs and whether the job involves a new install, repositioning or troubleshooting.
What is the 2 month rule for Starlink?
The Starlink 2 month rule can relate to Starlink account or service conditions, not the physical installation itself. Because these rules can change, it is best to check your Starlink account or Starlink support for current details before booking installation around a plan or location change.
Can I install Starlink myself?
You can install Starlink yourself if the mount is simple, roof access is safe and you are comfortable with cable routing and setup. A technician becomes more useful when roof work, secure mounting, tidy cabling or internal Wi-Fi coverage matters.
Is professional Starlink installation worth it?
Professional Starlink installation is worth it when mounting position, roof safety, cable routing, obstruction checks or Wi-Fi setup affect the result. It can help avoid poor dish placement, messy cable paths and weak internal coverage after installation.
What should I check before requesting a Starlink quote?
Before requesting a quote, check whether you have the Starlink kit, what roof type you have, where the dish may go, whether there are trees or obstructions, where the router should sit and whether you also need Wi-Fi support.
Can Starlink help if NBN is poor at my property?
Starlink can be useful for some properties where fixed-line internet is poor or unavailable. Installation focuses on mounting the Starlink hardware and setting up the internal connection. Internet availability and plan choice still depend on Starlink service conditions.
Do you provide Starlink installation packages?
Starlink installation packages depend on the property and the work required. Rather than using a fixed package for every job, the quote should reflect the mount type, access, cable path, router setup and any Wi-Fi or network support needed.
Request a Starlink installation quote
Tell Next Antenna what type of property you have, whether you already have the Starlink kit and where the dish may need to be mounted. You can request a quote for roof mounting, wall mounting, cable routing, router setup, Wi-Fi support or repositioning an existing Starlink dish.
Quote-friendly details
Send the property type, suburb, roof type, Starlink kit details and any photos that show the likely mount or cable path.
Tell us what you need help with
Send through a few details about the Starlink setup and Next Antenna will get back to you shortly.